

Before you start
Open the setup link in the invitation email we sent you, or the application setup URL we provided. Follow any sign-in instructions and check that the portal is for the correct application, organization, and environment.
- A setup invitation for your organization's IT administrator.
- Administrator access to your identity provider and authority to assign users.
- A test user who should have access to the application.
- ACS URL and SP Entity ID shown in your setup portal.
ACS URL and SP Entity ID shown in your setup portal
Downloaded IdP metadata XML file
The portal provides the connection-specific values and current setup steps. This page is a supporting reference. Follow the portal if the steps differ. Connection URLs may use an authentication service domain rather than our website's domain. Copy them exactly and keep test and production settings separate.
Treat your setup link as private. Share it only with authorized IT administrators. If it has expired or setup is already complete, contact us for the appropriate access.
Configure Google Workspace
Follow the provider instructions in your setup portal first. Use the steps below as a reference. Screenshots show example settings, not your connection values. Provider screens may differ by version or license.
-
Add a custom SAML application
Sign in to the Google Admin console. Open Apps, then Web and mobile apps. Select Add app, then Add custom SAML app. Name the application for the product you're connecting, such as Opportunity Tracker.
-
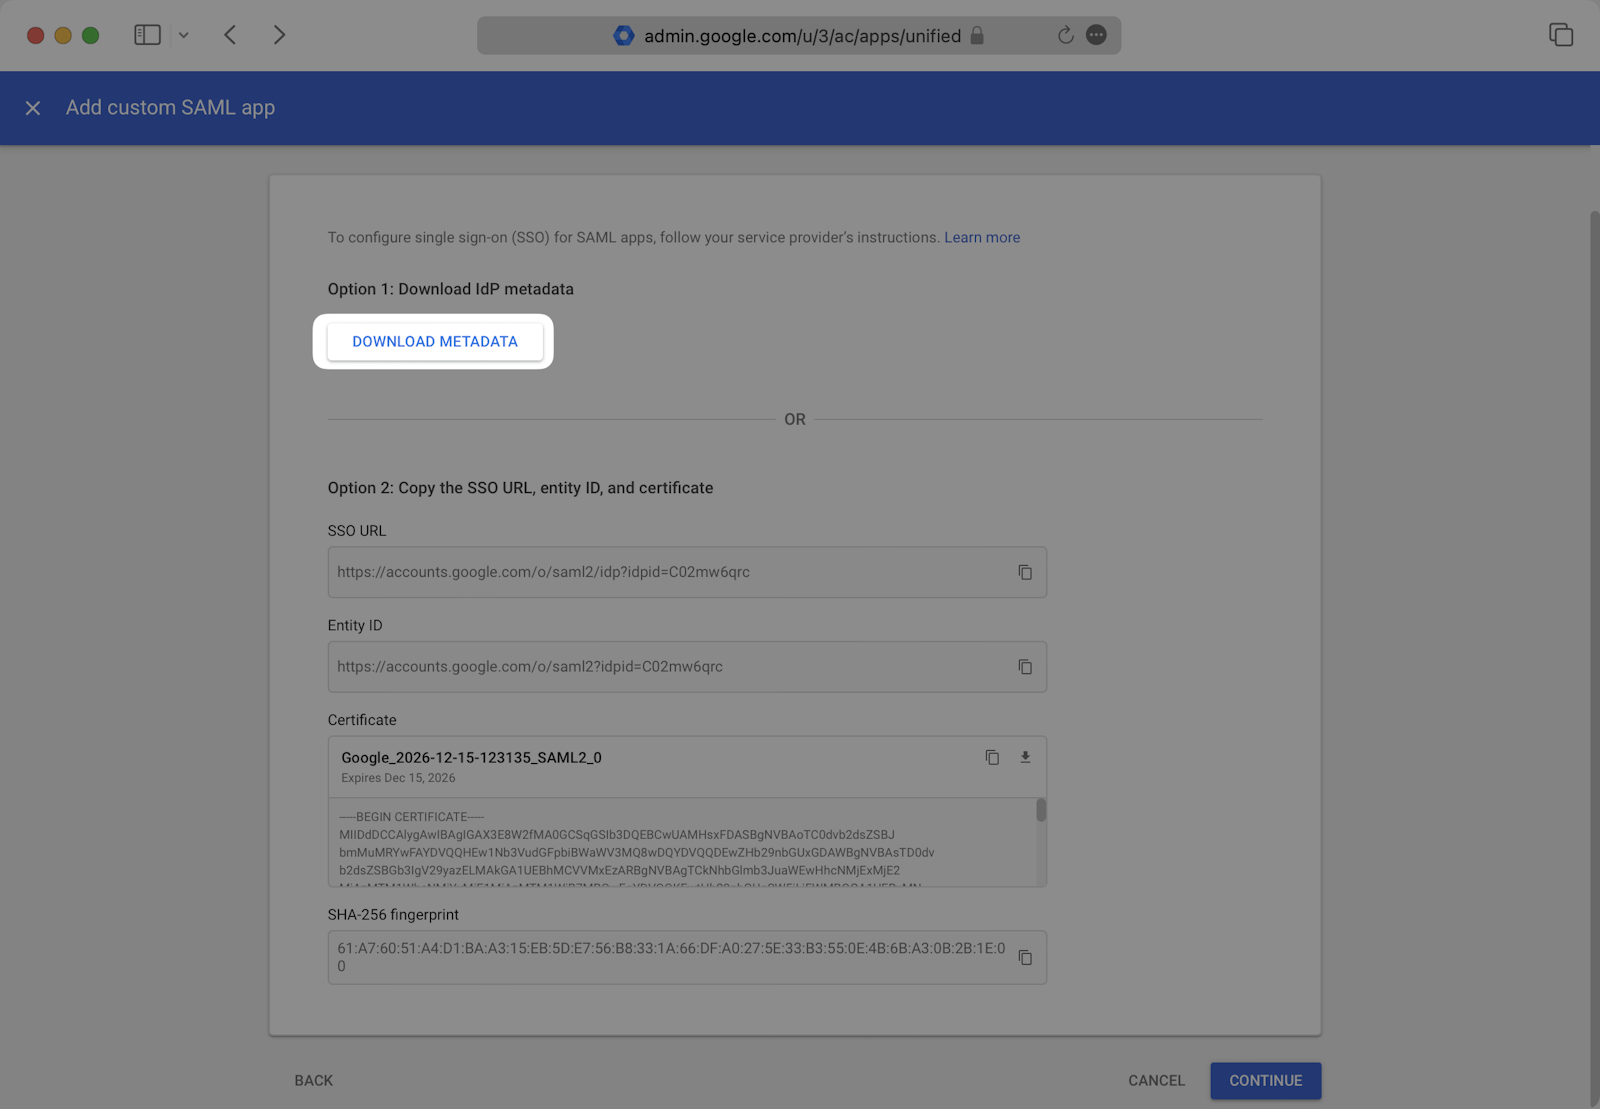
Download identity provider metadata
On the Google identity provider details screen, select Download metadata. Keep this XML file to upload in your setup portal, then continue.
-
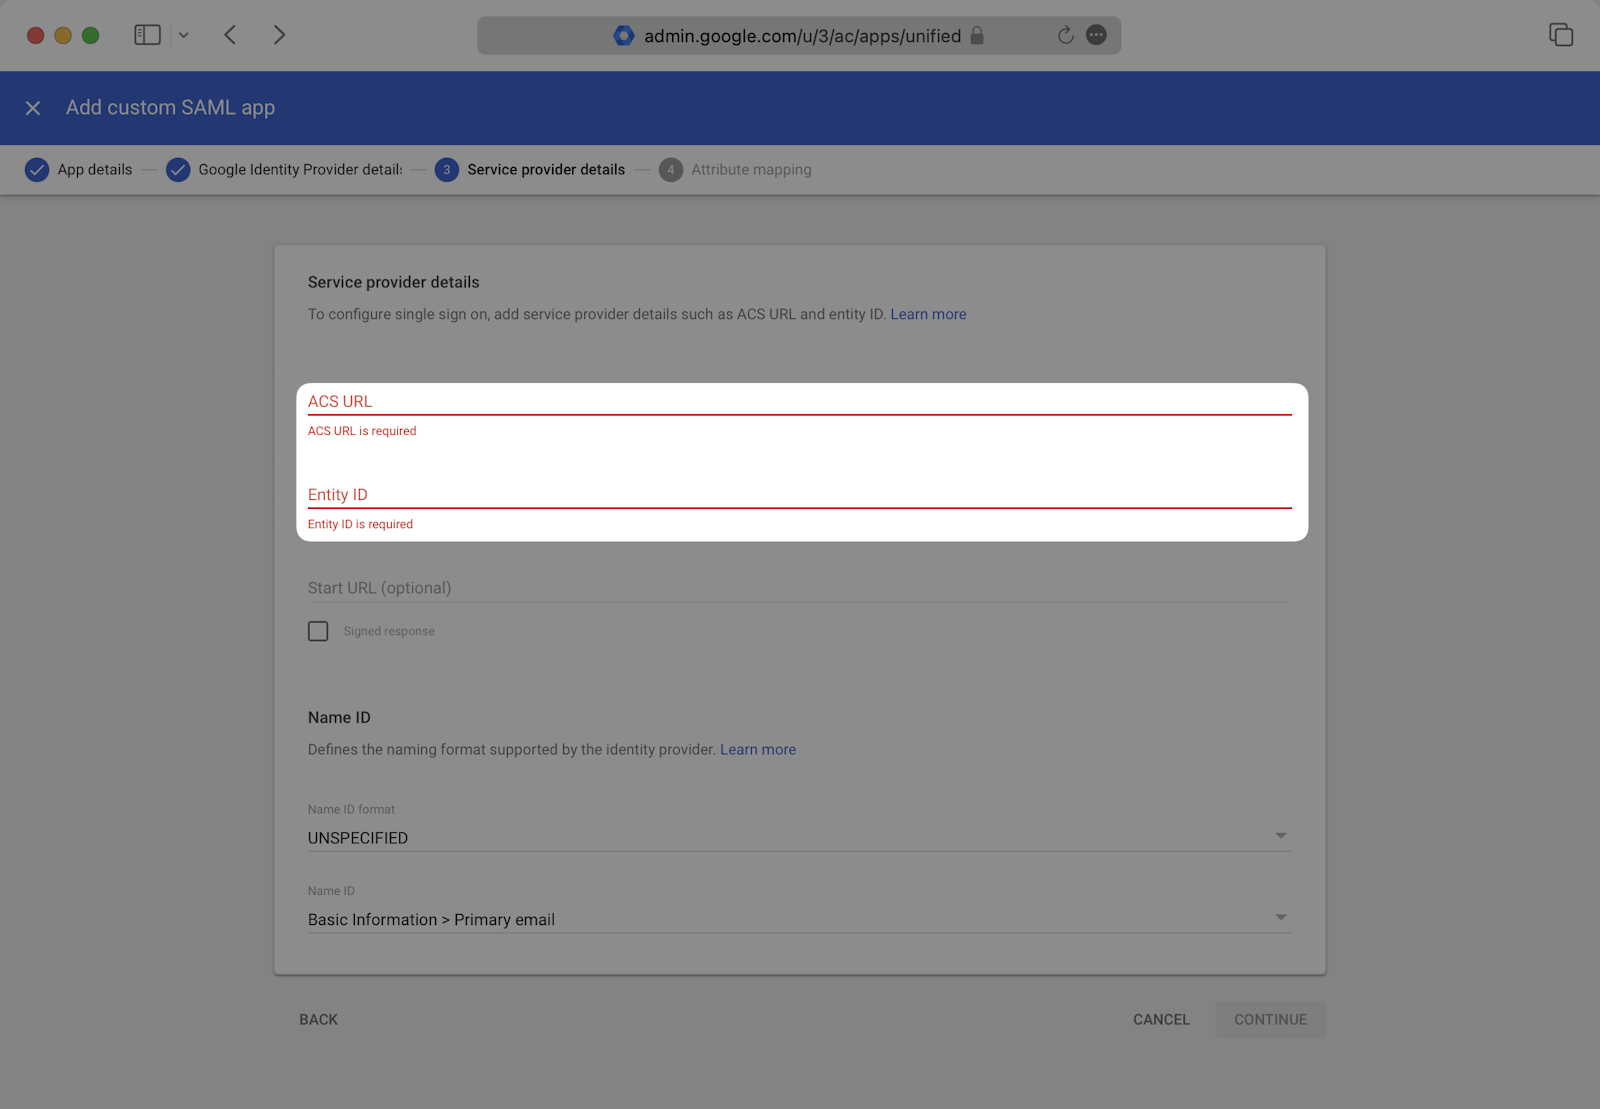
Enter service provider details
Set ACS URL and Entity ID to the exact values shown in your setup portal. Set Name ID format to UNSPECIFIED and Name ID to Basic Information > Primary email. Don't substitute EMAIL for UNSPECIFIED.
-
Map attributes and enable access
Map the user's primary email, first name, and last name to email, firstName, and lastName. Finish setup. Open User access and turn the service on for the organizational units or groups that should have access. Save the changes.
- Google Workspace SAML does not offer an id attribute mapping. Use the primary email as the Name ID as described above.
- Access changes can take up to 24 hours to propagate.
Attribute mapping
| Outgoing claim or attribute | Source value |
|---|---|
email |
Basic Information > Primary email |
firstName |
Basic Information > First name |
lastName |
Basic Information > Last name |
Match attribute names and capitalization exactly. Confirm the values are populated for your test user.
Save the connection in the setup portal
Return to the same setup portal you opened from your setup invitation. Enter or upload the provider details it requests:
- Downloaded IdP metadata XML file.
Save the configuration and follow the portal's prompts. You do not need to email these details to us. If a required field or upload is missing, stop and contact us rather than sending credentials through another channel.
Upload identity provider metadata or the public signing certificate requested by the portal. Never upload or send your SAML signing private key.
These documentation pages do not collect credentials or create connections. Complete setup in your organization's private setup portal.
Test before rollout
- After saving the connection, use the setup portal's Test sign-in action when available. Sign in with the assigned test user and check the result.
- Also test the actual application sign-in in a private browser window. A successful portal test does not confirm application membership or permissions.
- Confirm the correct organization and identity provider appear.
- Confirm sign-in returns to the intended application with the correct email and account.
- Confirm the user has the expected application permissions. Authentication alone does not grant application roles.
- Check that a user who should not have access cannot enter the application.
- Agree on rollout and a recovery access method before requiring SSO for everyone.
If the portal requests domain verification, have your DNS administrator add the exact record shown there. Complete the required verification and testing before enforcing SSO. Contact us if you cannot complete a required step.
Troubleshooting
The setup link has expired or no longer opens
Contact us for a fresh invitation or the appropriate management access. Do not forward your private setup link or include it in a support ticket.
The provider rejects the redirect, reply URL, or audience
Compare the configured values with the exact connection details shown in your setup portal. Check the protocol, path, trailing slash, and environment. Don't substitute the application homepage for the authentication callback.
The user isn't assigned or access is denied
Confirm the user or group assignment and the provider's access policy. Also check your organization membership and application permissions with us. For Google Workspace, access changes can take up to 24 hours.
Email or name information is missing
Check the mapped fields for the test user and the outgoing attribute names. For OIDC, check the ID token claims. Ask us to validate the identity response through our secure diagnostics process.
Sign-in fails after a certificate or secret change
Check expiration dates and whether the connection has the updated metadata, public signing certificate, or client credential. Coordinate rotation before replacing a credential used by a live connection.
Can groups assign application roles automatically?
Only configure group claims after we confirm the application's role-mapping support and the intended mappings. Sending groups alone doesn't grant application permissions. Don't assume a group named Admin will receive administrator access.
Need a hand?
Send us your provider name, application, organization, environment, and the time and error code from the failed sign-in. Don't include passwords, client secrets, private keys, tokens, private setup links, or raw SAML responses.